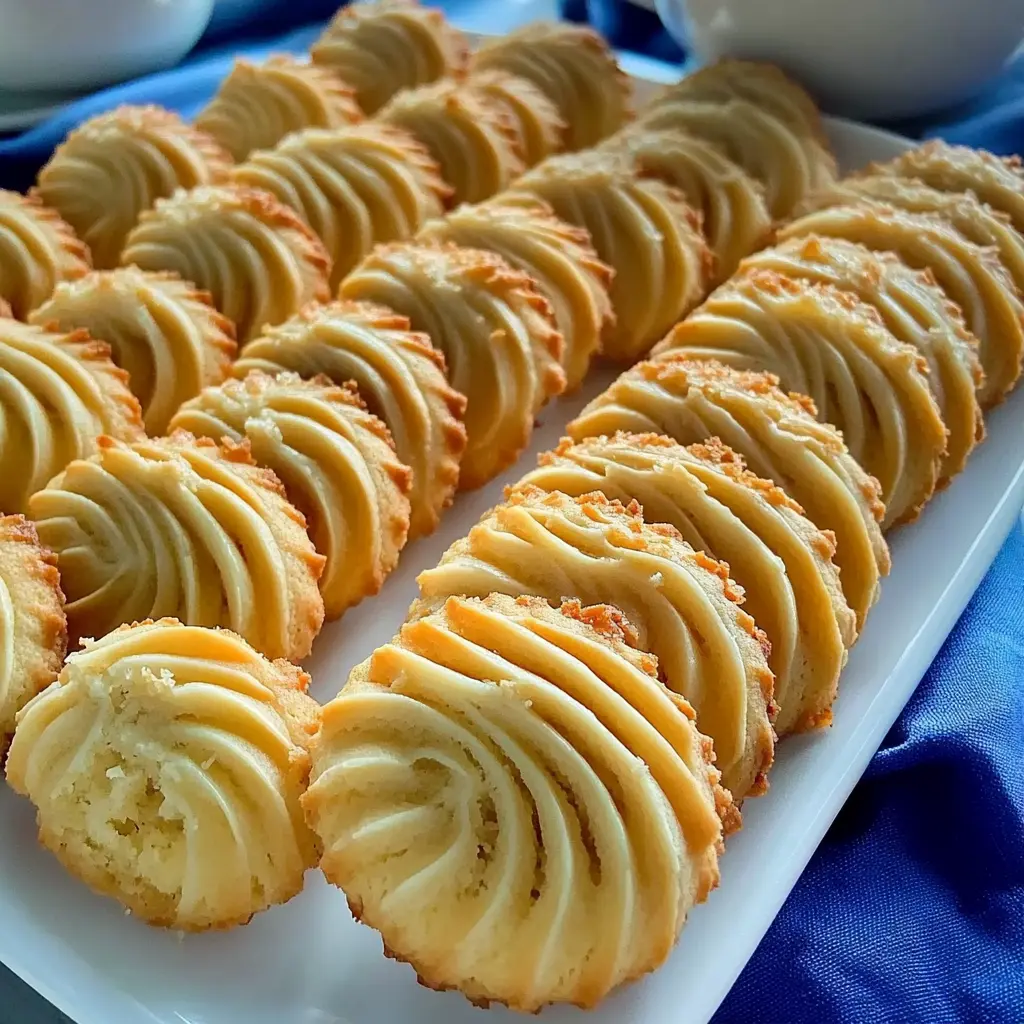
There’s something irresistible about the sweet, tropical aroma of coconut biscuits baking in the oven. These Milky Coconut Biscuits combine the rich creaminess of milk with the exotic flavor of coconut to create treats that are simultaneously familiar and special. I perfected this recipe after numerous attempts to capture that perfect balance between tender crumb and satisfying crunch. Trust me when I say these biscuits disappear almost as quickly as they cool—they’re that good! Whether served with afternoon tea or packed as a lunchbox treat, these biscuits bring a touch of tropical indulgence to any occasion.
Why You’ll Love These Milky Coconut Biscuits
- Perfect Texture – Crisp edges with a slightly chewy center create an incredibly satisfying bite
- Balanced Flavor – The sweetness of coconut paired with creamy milk creates depth without being overwhelming
- Simple Ingredients – Uses pantry staples you likely already have on hand
- Versatile Treats – Equally delicious with morning coffee, afternoon tea, or as a light dessert
Contents
Table of Contents
Ingredients for Milky Coconut Biscuits
- All-purpose flour – The foundation that provides structure to our biscuits
- Baking powder – Creates the perfect rise for a light texture
- Salt – Enhances all the flavors and balances the sweetness
- Unsalted butter – Adds richness and creates tender layers (must be cold for best results)
- Granulated sugar – Provides just the right sweetness
- Shredded coconut – The star ingredient that brings tropical flavor (unsweetened works best)
- Whole milk – Adds moisture and creamy flavor (full-fat produces the best results)
- Vanilla extract – Enhances the coconut flavor with warm, aromatic notes
- Optional: Coconut extract – For an extra burst of coconut flavor
- Optional: White chocolate chips – A delicious addition for extra indulgence
How to Make Milky Coconut Biscuits
Step 1: Prepare Your Ingredients and Equipment
Preheat your oven to 350°F (175°C) and line two baking sheets with parchment paper. Measure all ingredients before starting—baking is a science, and precision matters! If your butter has been in the refrigerator, it’s at the perfect temperature. If not, place it in the freezer for 10-15 minutes to chill.
Step 2: Mix the Dry Ingredients
In a large bowl, whisk together 2 cups of all-purpose flour, 1½ teaspoons of baking powder, and ½ teaspoon of salt. This ensures even distribution of the leavening and eliminates any lumps in the flour.

Step 3: Cut in the Butter
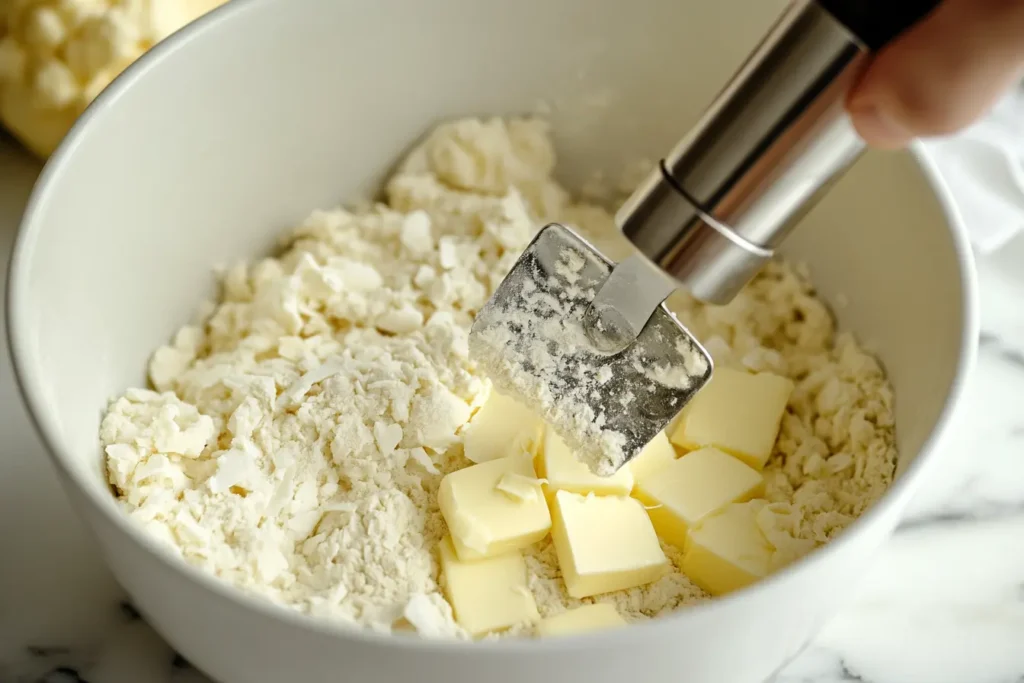
Cut 1/2 cup (1 stick) of cold unsalted butter into small cubes. Add these to your flour mixture and use a pastry cutter or two knives to cut the butter into the flour until the mixture resembles coarse crumbs with pea-sized pieces of butter still visible. These small pockets of butter will create lovely tender layers in your biscuits.
Step 4: Add the Coconut and Sugar
Stir in 1 cup of shredded coconut and 1/3 cup of granulated sugar, mixing until evenly distributed throughout the flour mixture. The coconut should be nicely coated with flour to prevent clumping.
Step 5: Incorporate the Wet Ingredients
Make a well in the center of your dry ingredients. Pour in 3/4 cup of cold whole milk, 1 teaspoon of vanilla extract, and 1/4 teaspoon of coconut extract if using. Stir gently with a fork or wooden spoon until just combined. The dough will be slightly sticky but should hold together. Be careful not to overmix this can make your biscuits tough rather than tender.
Step 6: Shape the Biscuits
Turn the dough out onto a lightly floured surface. Pat it gently into a rectangle about 3/4-inch thick. Use a 2.5-inch round biscuit cutter to cut out biscuits, pressing straight down without twisting (twisting seals the edges and can prevent proper rising). Place the biscuits about 2 inches apart on your prepared baking sheets.
Gather the scraps, gently press them together, and cut out additional biscuits until all the dough is used. If adding white chocolate chips, you can gently press a few into the tops of each biscuit.
Step 7: Bake to Perfection
Bake in your preheated oven for 15-18 minutes, or until the biscuits are lightly golden around the edges and set in the center. The baking time may vary depending on your oven, so start checking at the 13-minute mark.
Step 8: Cool and Enjoy
Allow the biscuits to cool on the baking sheets for 5 minutes, then transfer to a wire rack to cool completely. They’re delicious warm, at room temperature, or even the next day!
Variations to Try
- Chocolate Coconut – Fold in 1/2 cup of semi-sweet chocolate chips to the dough before shaping
- Lemon Coconut – Add 1 tablespoon of lemon zest to the dry ingredients for a bright citrus note. If you enjoy citrus baked goods, you might also love these Soft Fluffy Lemon Muffins which have a similar light texture.
- Coconut Jam Thumbprints – Make an indentation in the center of each biscuit before baking and fill with a teaspoon of your favorite jam
- Drizzled Delight – Once cooled, drizzle biscuits with melted white chocolate for an extra special touch
Pro Tips for Perfect Milky Coconut Biscuits
- Cold Ingredients Are Key – Keep your butter and milk cold until the moment you use them for the flakiest texture
- Light Touch – Handle the dough as little as possible to maintain tenderness
- Coconut Selection – If using sweetened coconut, reduce the sugar in the recipe by 2 tablespoons
- Perfect Cutting – Flour your biscuit cutter between cuts to ensure clean edges that rise properly
How to Serve Milky Coconut Biscuits
These versatile biscuits can be served in numerous ways:
For breakfast, split and toast them lightly, then spread with butter and honey or coconut jam. They’re perfect alongside a strong cup of coffee or tea.
For afternoon tea, serve them as is on a pretty platter, perhaps with some fresh berries for color contrast. They pair beautifully with Earl Grey or a tropical-flavored tea.
For dessert, use them as the base for a quick strawberry shortcake—just split, fill with whipped cream and fresh berries, and enjoy a tropical twist on a classic.
Storage and Make Ahead
Storing Leftovers
Store completely cooled biscuits in an airtight container at room temperature for up to 3 days. For longer storage, place in the refrigerator for up to a week.
Freezing Instructions
These biscuits freeze beautifully! Place cooled biscuits in a single layer on a baking sheet and freeze until solid, then transfer to a freezer-safe bag or container. They’ll keep for up to 3 months. Thaw at room temperature or warm slightly in a 300°F oven for that fresh-baked taste.
Make-Ahead Options
You can prepare the dough ahead of time and refrigerate it for up to 24 hours before shaping and baking. Alternatively, shape the biscuits, place them on a baking sheet, and freeze until solid. Transfer to a freezer bag for storage, then bake directly from frozen, adding a few extra minutes to the baking time.
Can I use coconut milk instead of regular milk?
Absolutely! Coconut milk makes a wonderful substitute and intensifies the coconut flavor. Use the same amount as you would regular milk.
Why did my biscuits spread too much while baking?
This typically happens when the butter gets too warm before baking. If your dough feels very soft after mixing, refrigerate it for 15-20 minutes before shaping and baking.
Can I make these biscuits gluten-free?
Yes, you can substitute a 1:1 gluten-free flour blend for the all-purpose flour. The texture may be slightly different, but they’ll still be delicious.
What’s the best way to measure flour for this recipe?
For most accurate results, spoon flour into your measuring cup and level it off with a knife rather than scooping directly with the measuring cup, which can pack too much flour and result in dry biscuits.
FAQs About Milky Coconut Biscuits
Can I use coconut milk instead of regular milk?
Absolutely! Coconut milk makes a wonderful substitute and intensifies the coconut flavor. Use the same amount as you would regular milk.
Why did my biscuits spread too much while baking?
This typically happens when the butter gets too warm before baking. If your dough feels very soft after mixing, refrigerate it for 15-20 minutes before shaping and baking.
Can I make these biscuits gluten-free?
Yes, you can substitute a 1:1 gluten-free flour blend for the all-purpose flour. The texture may be slightly different, but they’ll still be delicious.
What’s the best way to measure flour for this recipe?
For most accurate results, spoon flour into your measuring cup and level it off with a knife rather than scooping directly with the measuring cup, which can pack too much flour and result in dry biscuits.
A Tropical Twist on Classic Biscuits
These Milky Coconut Biscuits bring together the comfort of traditional biscuits with the exotic flair of coconut. The combination creates something truly special—familiar enough to feel like home, yet unique enough to stand out among ordinary cookies and biscuits.
What I love most about this recipe is its versatility. These biscuits can transition easily from a simple snack to an impressive addition to a dessert spread. The subtle coconut flavor appeals to both coconut enthusiasts and those who might typically shy away from stronger tropical flavors.
Whether you’re baking these for a special occasion or simply to brighten an ordinary day, these Milky Coconut Biscuits are sure to bring smiles and requests for the recipe. Once you master this simple technique, you’ll find yourself reaching for this recipe whenever you want to add a touch of something special to your baking repertoire.

Milky Coconut Biscuits
Equipment
- Mixing Bowl
- Baking Sheet
- Oven
Ingredients
Main Ingredients
- 1 1/2 cups all-purpose flour
- 1 cup shredded coconut unsweetened or sweetened
- 1/2 tsp baking powder
- 1/4 tsp salt
- 1/2 cup unsalted butter softened
- 1/2 cup granulated sugar
- 1/4 cup sweetened condensed milk
- 1 large egg
- 1 tsp vanilla extract
Instructions
- Preheat oven to 350°F (175°C) and line a baking sheet with parchment paper.
- In a bowl, whisk together flour, shredded coconut, baking powder, and salt. Set aside.
- In a separate bowl, beat butter and sugar until light and fluffy.
- Add condensed milk, egg, and vanilla extract, mixing until smooth.
- Gradually add the dry ingredients, stirring until a soft dough forms.
- Drop spoonfuls of dough onto the prepared baking sheet, spacing them 2 inches apart.
- Bake for 10-12 minutes or until the edges are golden brown.
- Let cool on a wire rack before serving.

